Well, I actually woke up late enough (1:30) but forgot about the fog... So, no combined shots for now :-(
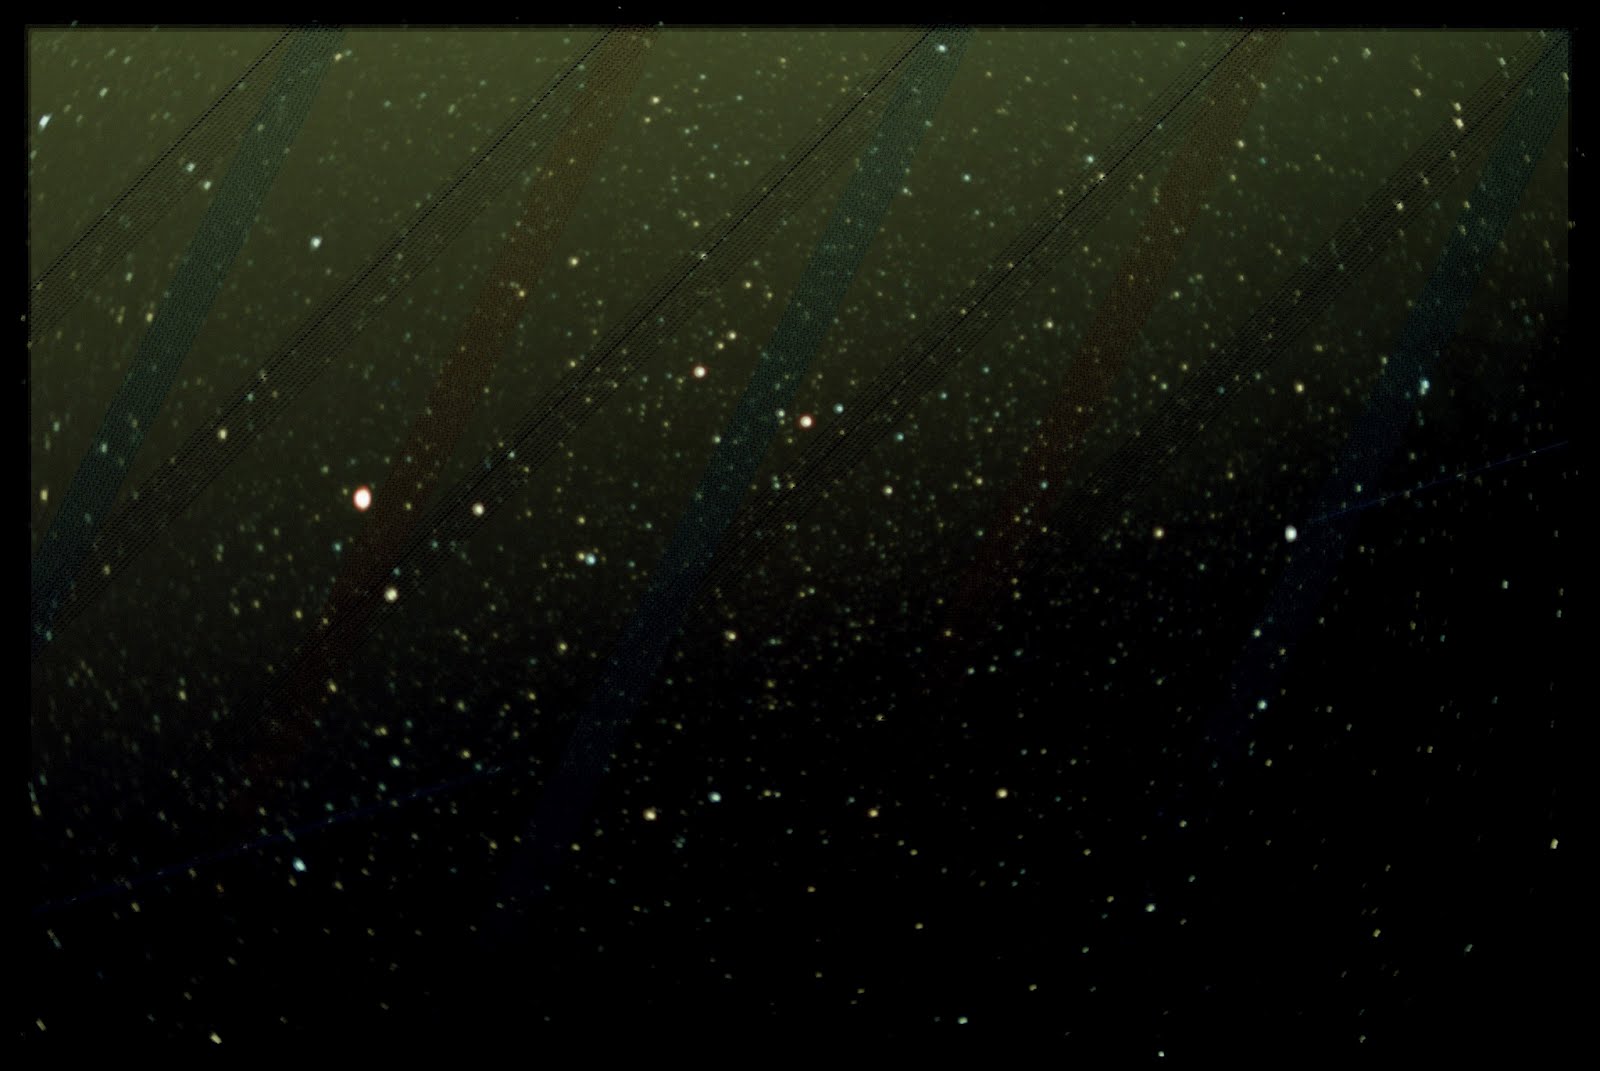
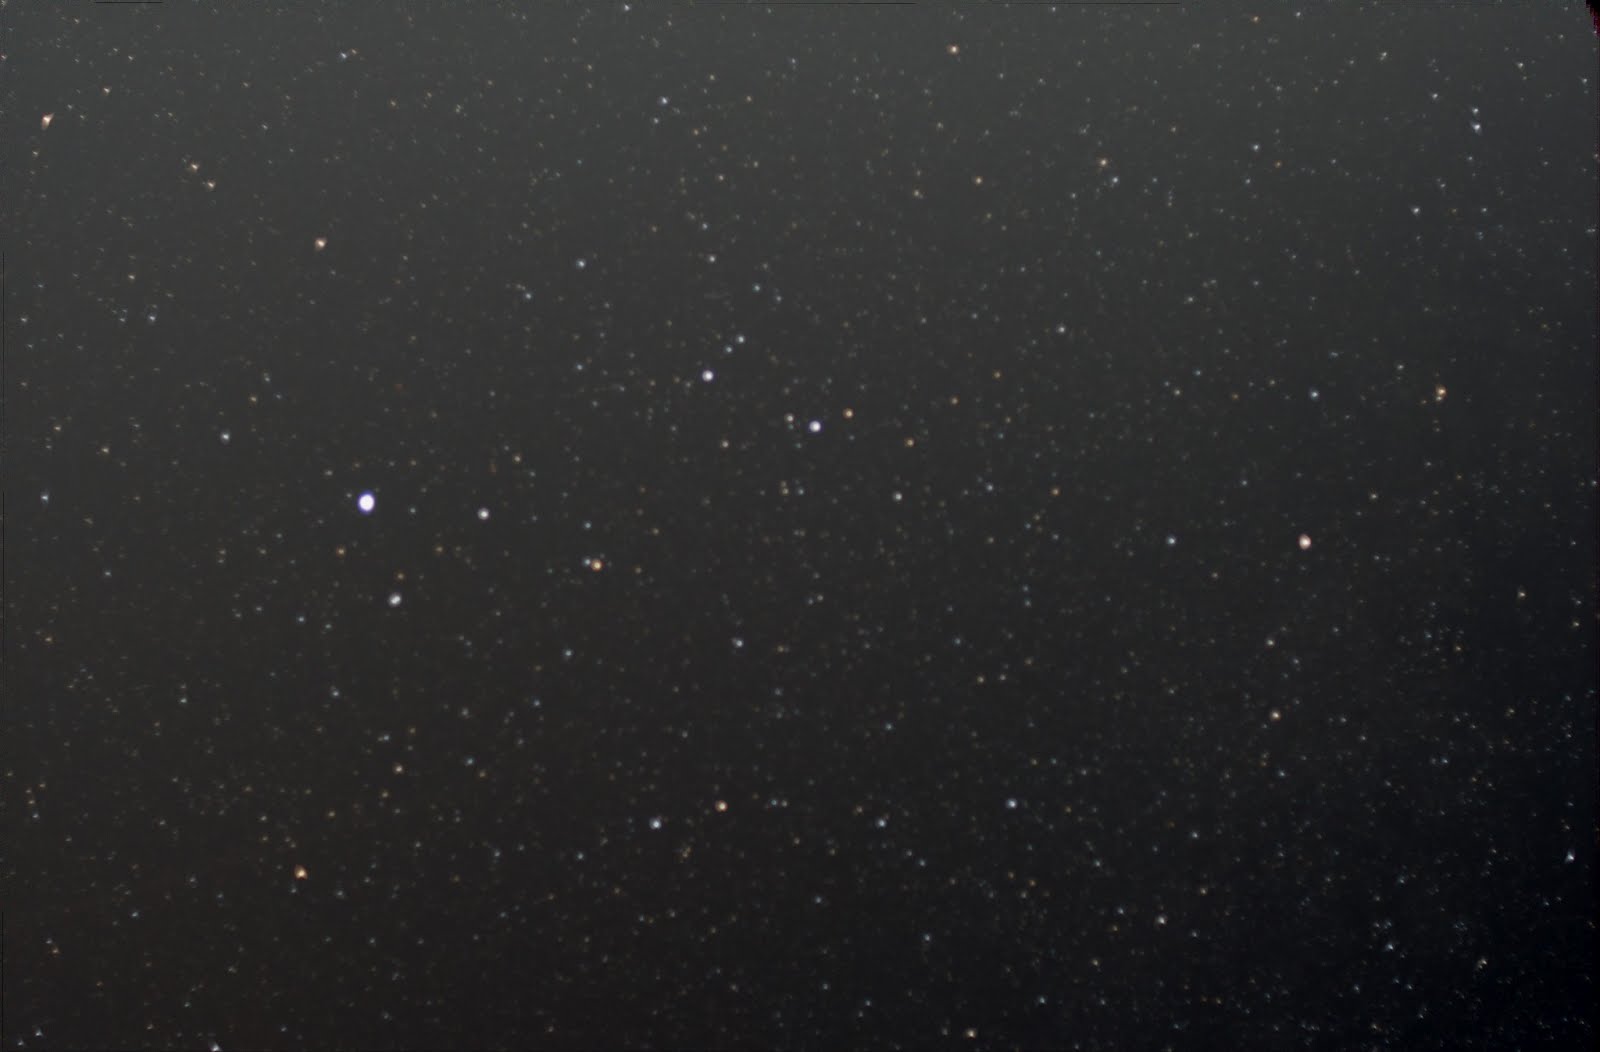
Pre-processed all images. Here are the results after some basic post-processing (background color adjust, DDP Stretch - I tried Sharpening and Noise reduction too, but they don’t seem to have any impact):
Comparing different noise corrections:
1. None
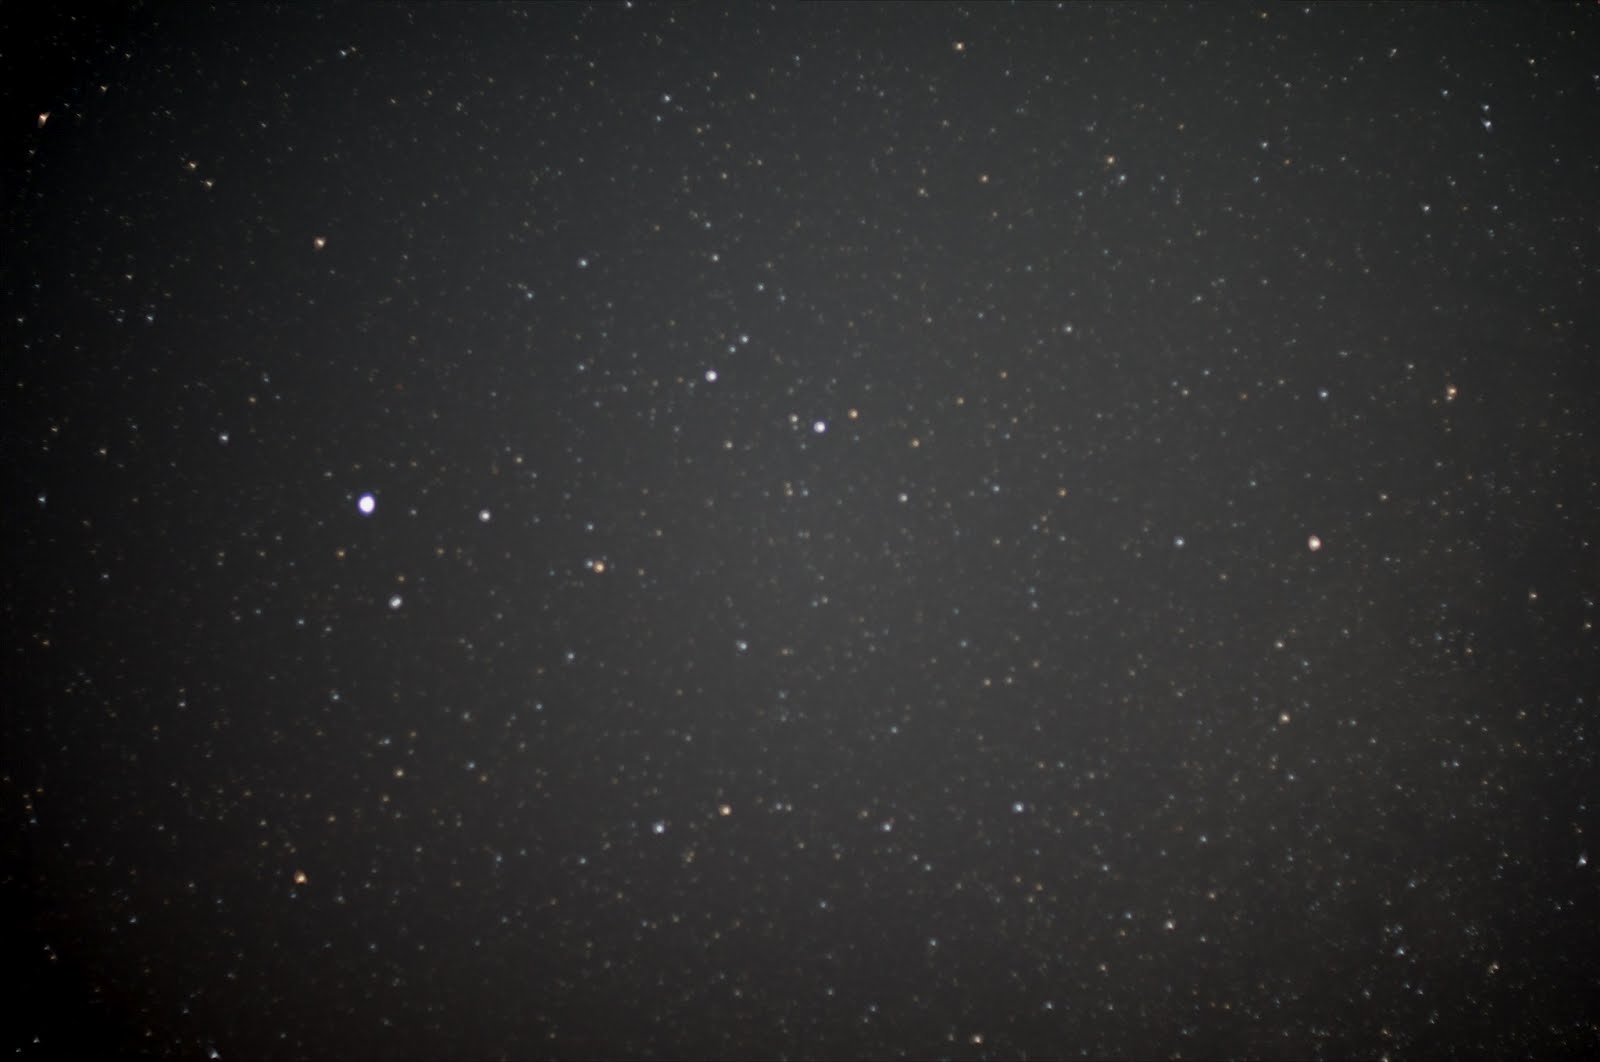
2. With explicit darks

3. With camera noise reduction
Can’t see much of a difference, but you can clearly see the vignetting.
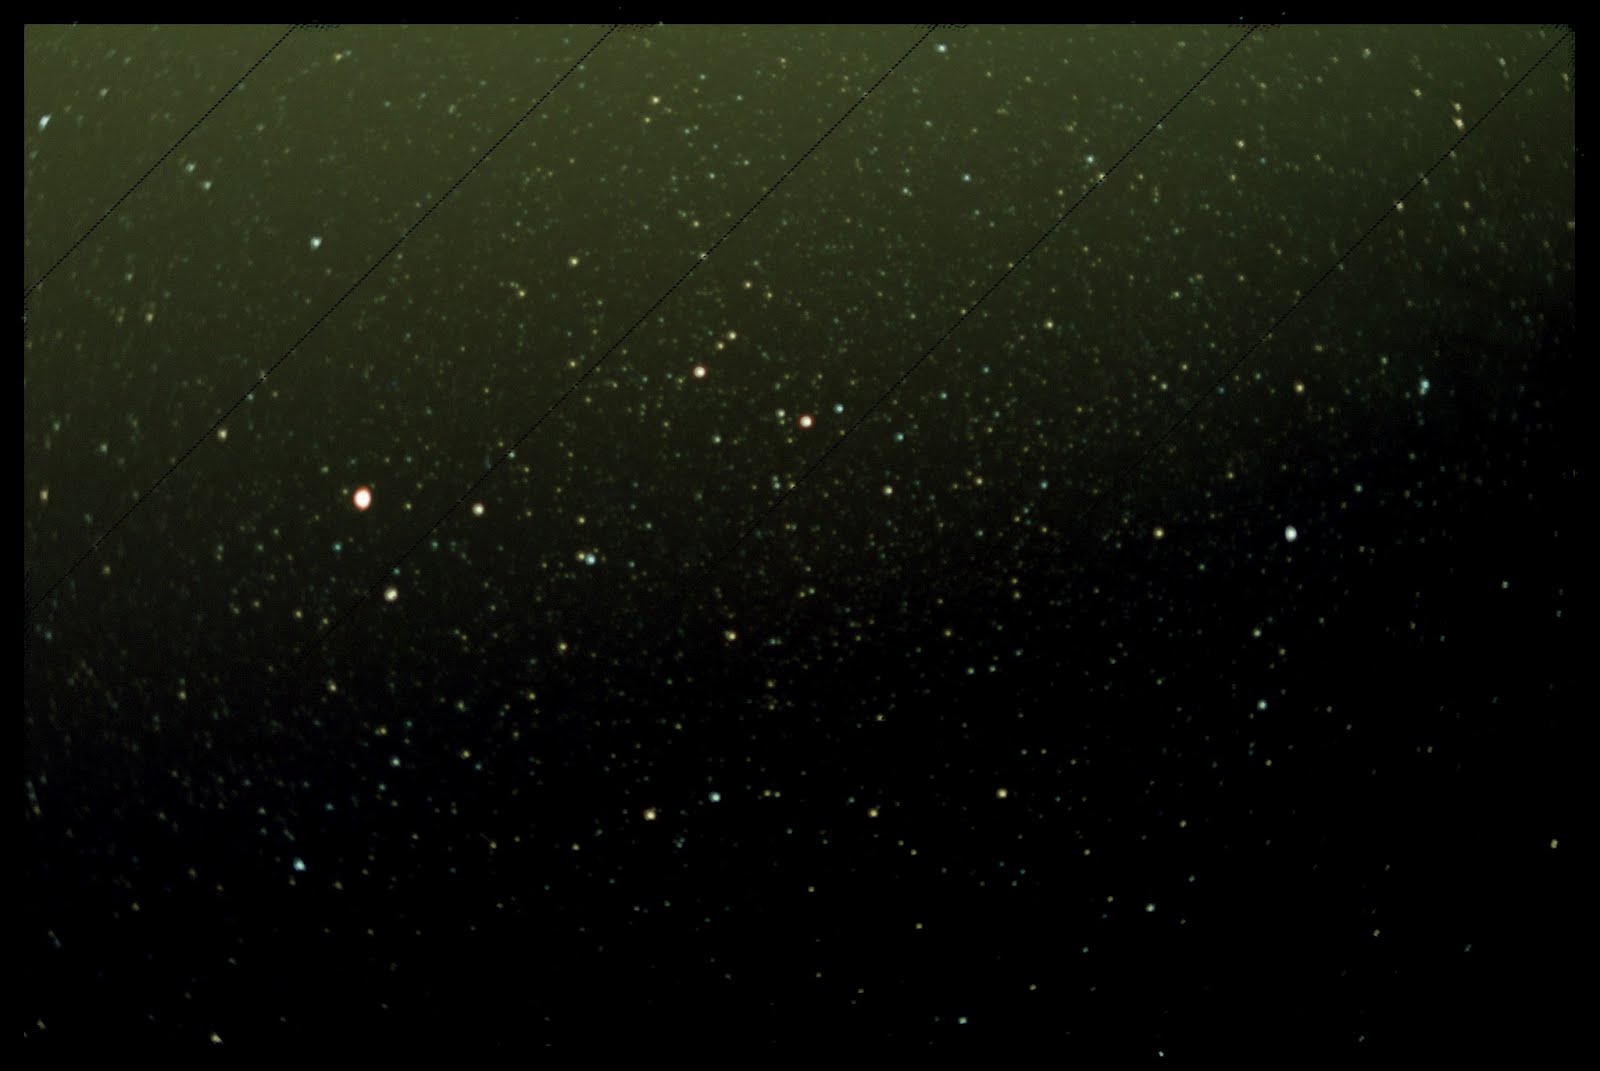
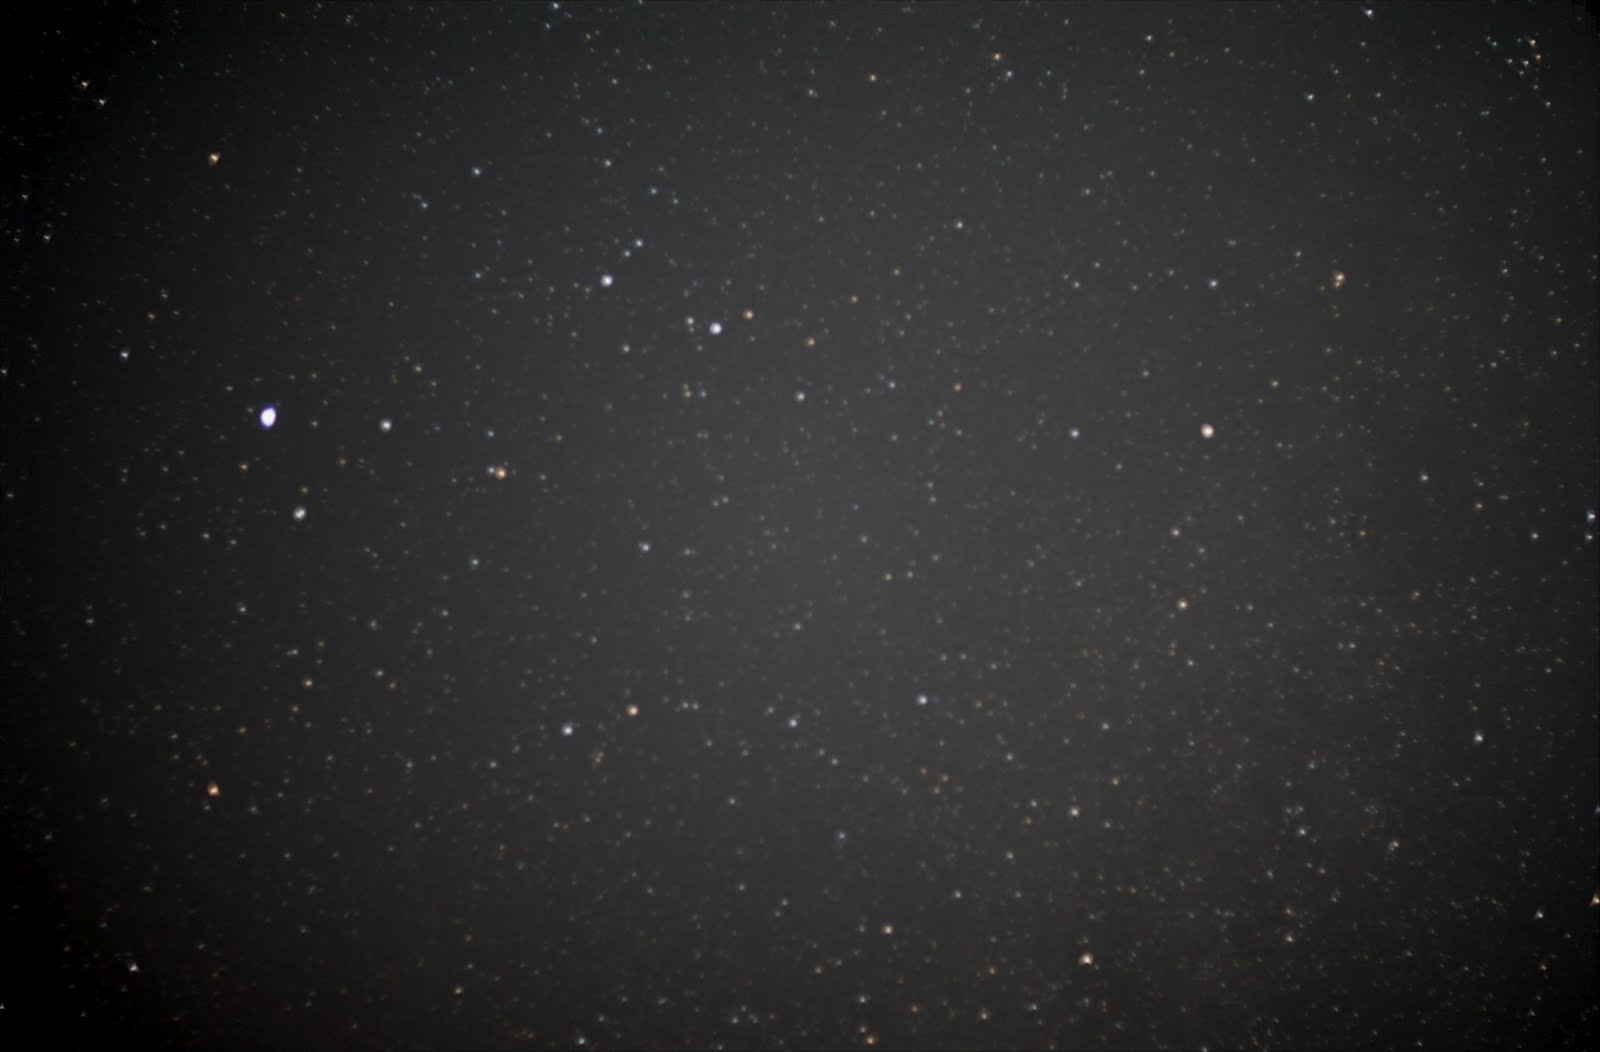
So, here are the 2 different noise reductions with and without flat correction:
1. Noise reduced with explicit darks:
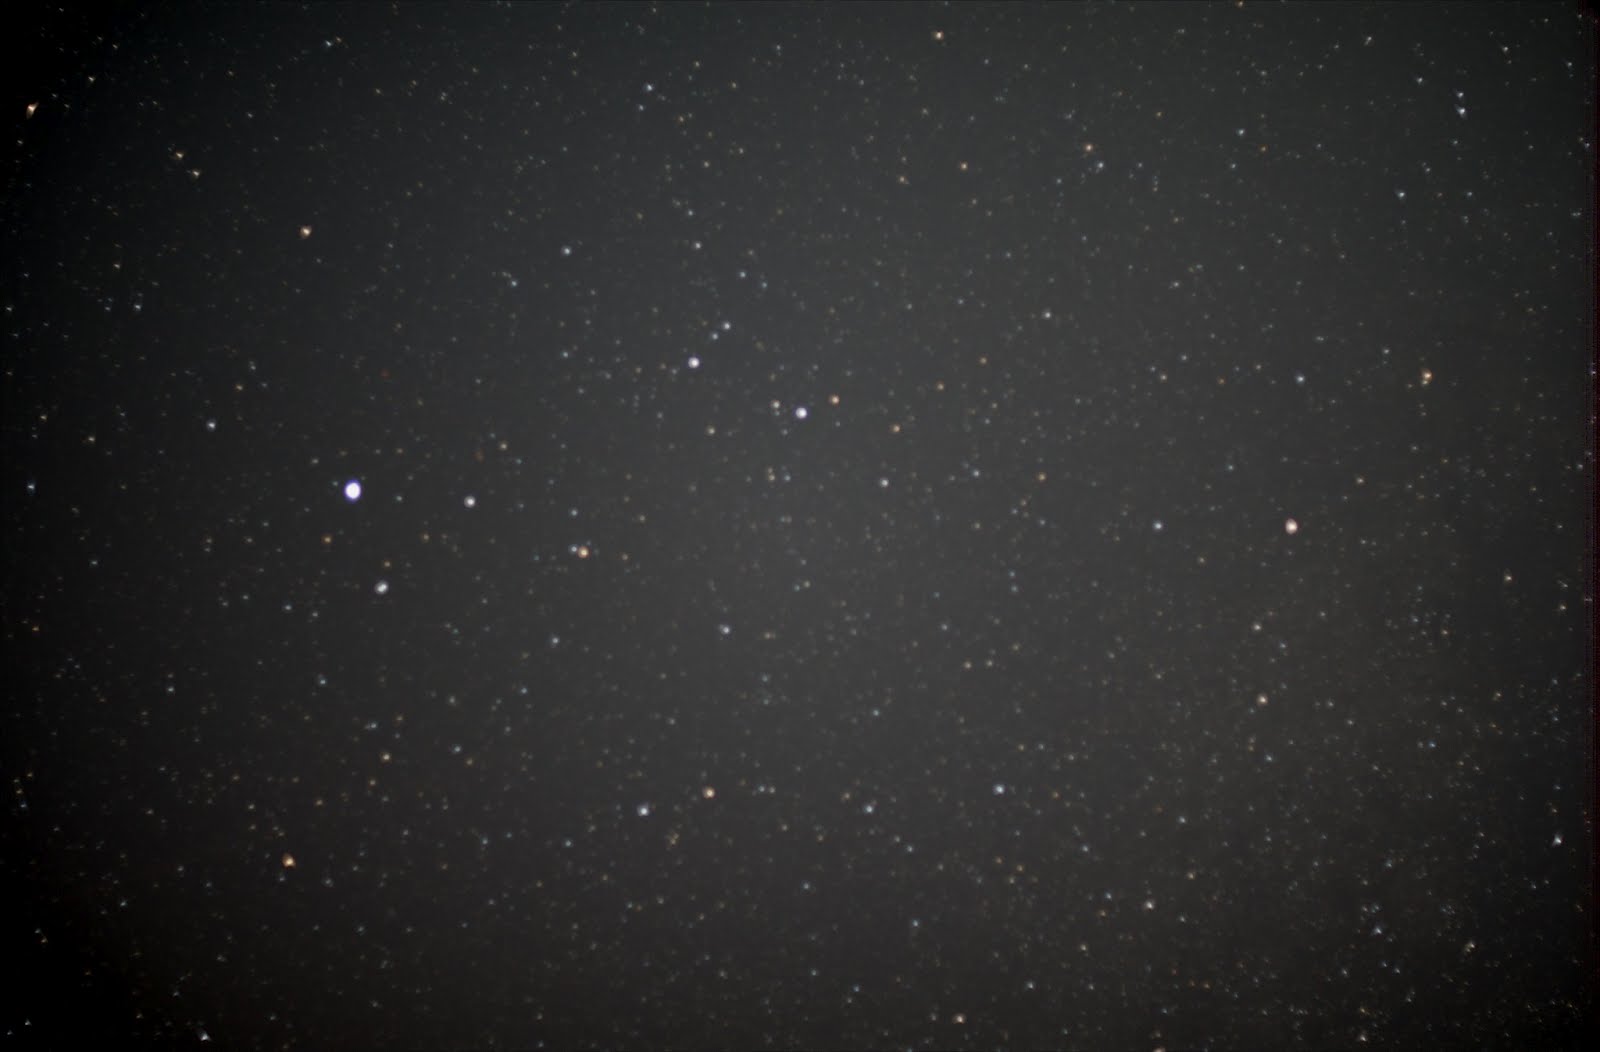
2. Noise reduction from the camera

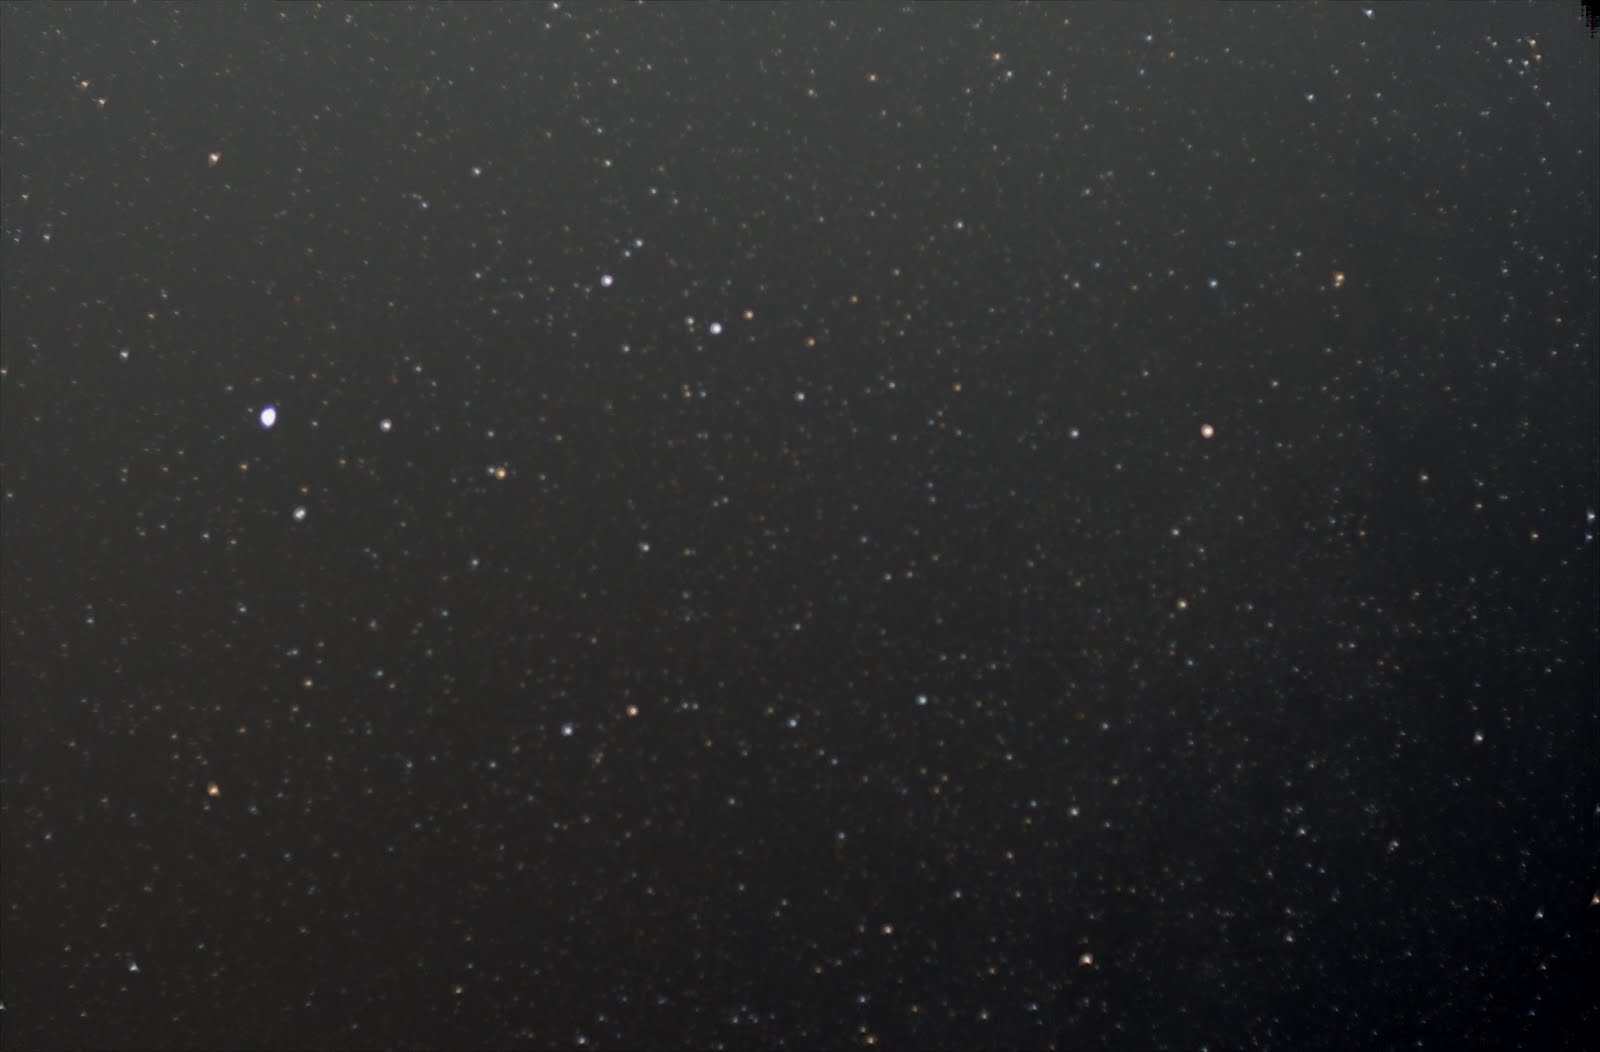
The vignetting effect is clearly visible - shows how important it is to take the flats (though next time I need to take them the correct way - with ISO 100 and proper shutter speed).
But there isn’t a visible difference between the two different noise reductions. I guess that doesn’t matter too much.
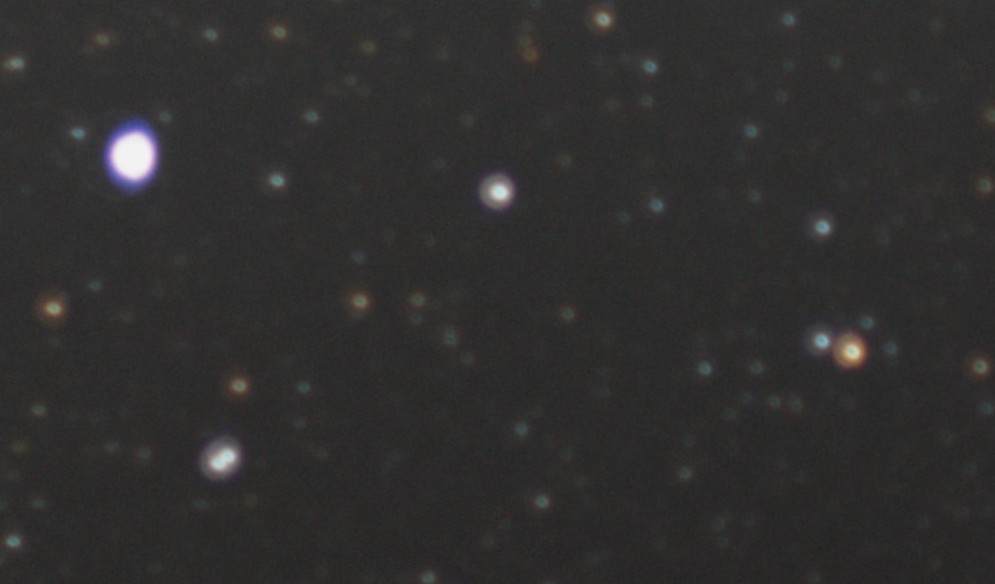
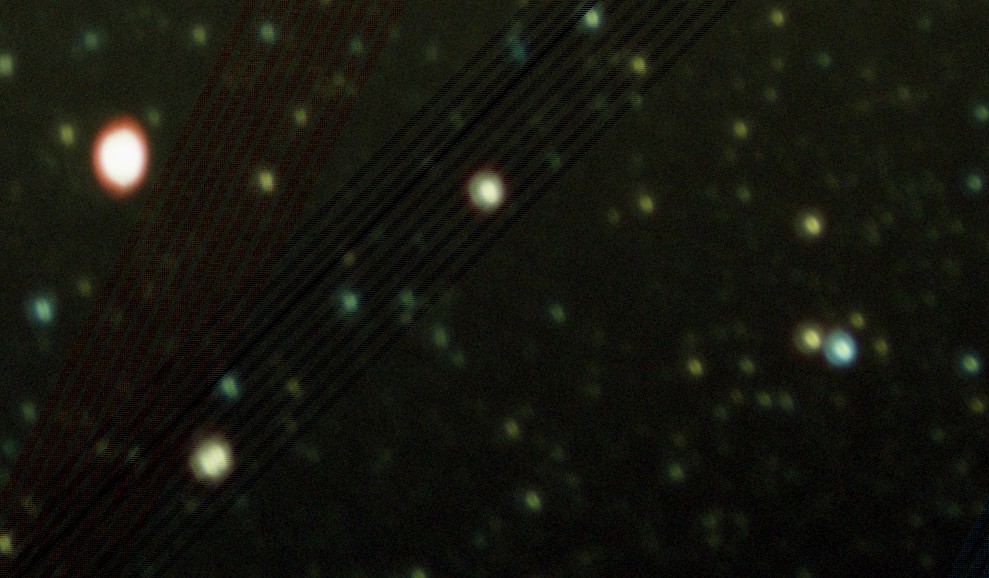
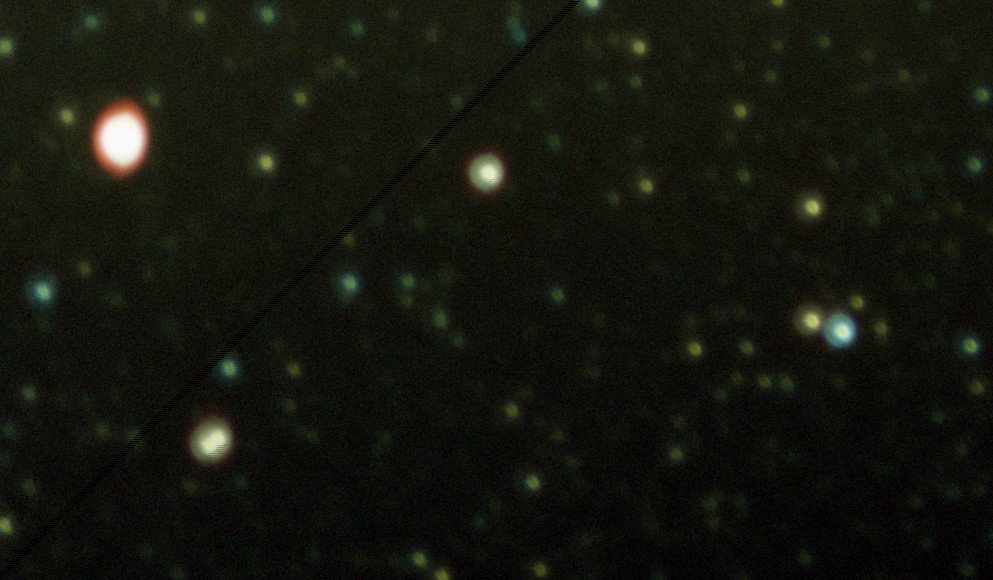
Now, I have to get better with color corrections (so far I just applied some default post-processing steps). And also I have to do a better job in focusing. The following is a zoom into this image:
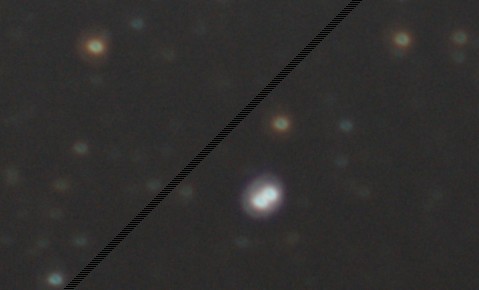
I guess, that’s where I have to figure out how to do computer-supported focusing - don’t think I can do it better with the naked eye (the strange diagonal line is from Nebulosity - still don’t have a license).
After playing with all those tools, I’ll probably stick with DSS, Nebulosity and I hope that DSLR Shutter will work with my DSUBS cable. These are fairly simple and should work for me for some time. Nebulosity has a lot of manual pre-processing that I could use if DSS fails.
Just got the notification that the focal reducer was delivered (to work) and that the DSUBS cable will arrive on Thursday. Can’t wait to try it.
Also got a reply from the Avistack guys - seems as if it’s not that easy to load .mov files. But considering that I am not able to take a movie of the moon that’s not overlit, I won’t need this any time soon anyway.
Have to figure out what pictures I want to take tonight.
… actually not - it’s completely overcast.
So, I’m reading more on focusing. I am somewhat surprised that nobody came up with a mixed software/hardware solution that does this automatically. All solutions rely on doing the correction to achieve focus manually.
For the telescope, a Bahtinov mask sounds like a fast way (or these are way cheaper) - but need to measure the outside diameter of my telescope. Or Stilletto to get really fancy. Not sure what to do when I just want to take photos with a lens and not the telescope.
Tried to process the movies in Avistack. But even after installing the avisynth server, KRSgrAVI.dll and KRSgrAVI.dlm - and even after installing the 64-bit version of the dll, still doesn’t work. Will send an email to the forum.
But the good news is that I got MaxIm working with my camera! The user interface is HORRIBLE, but I managed to create a sequence (delay, break, ISO, shutter speed)!!!! But there doesn’t seem to be a way to move the mirror up (plus delay) before taking an image. The only way to do that seems to be to use the BULB setting and cable and move the mirror up at the beginning and then run the sequence. I hope I get my DSUBS cable sooon to try that out. In the meantime I’ll try to figure out how “mirror up” works with my D7000. Unfortunately, that means that I have to take the pictures individually with the remote sensor until then.
While reading more about this I found some software that can combine pictures that have different parts of the image exposed correctly (Nik HDR Efex Pro). This together with bracketing could allow me to take some pretty nice photos of the ocean at night with the moon and the stars. Will try this out tonight.
And I was reading more about the strange lighting on my pictures (brighter in the middle and less and less towards the edges). This is probably vignetting (didn’t think I would encounter that with these simple shots). And the only way to get rid of it is to take some flats right after sunset. I’ll try to remember to do that this evening (maybe have to do that while we are at Dr. Statti’s). On some website, they mentioned a “super sky flat” technique. This would avoid having to do the flats in the evening, but I’m not sure if this only works for less stars. Maybe I’ll try both tonight.
So, program for tonight:
- Take flats plus flat darks in the evening
- Take lights with noise reduction of Vega
- Take lights without noise reduction of Vega
- Take darks
- Take “super sky flats”
- Take some bracketed shots of the beach, sky and moon (I probably have to move further back for that)
And then I can make 4 sets:
- noise reduced with flats
- noise reduced without flats
- lights with flats and darks
- lights and darks
And then compare.
And then try to combine the beach photos to one.
OK, back from the beach. Unfortunately, I couldn’t take the bracketed shots because the moon is too high (if I’m motivated enough, I might go out later when the moon is lower).
But I got all the other shots, plus some shots from saturn - though they have a very bright background as it was low on the horizon.
Started post-processing the pictures from last night. Deep Sky Stacker had absolutely no problem to stack the images (at some point I saw a star count of 150 something on the screen!)
So, stacking was fairly straight forward!
Then I tried to load that picture in Nebulosity for further processing, but I first had to store them in the FIT format. Either DSS can’t store correctly 32bit or Nebulosity can’t read it correctly. So, for now I have to do with 16bit.
But I’m still struggling with the post processing. Nebulosity has a couple of default steps that make the picture look better, but it’s not very impressive. Plus the resulting picture has a very bright background in a circle, but at the edges it’s almost black. I’m sure that’s not from stacking as the photos had HUGE overlap.
Downloaded RegiStax to stack the moon movie. And then I had to download a converter that converts my movie to an .avi file. But somehow I can’t see anything in RegiStax when I load the movie. Maybe it’s too long? Also, I should have taken the movie with a much smaller apperture. There are almost no details from the moon - it’s just very bright, white.
So tonight (if the weather allows):
- take another film of the moon with proper apperture, and
- take two series of the same object - one with automatic long exposure correction, one without.
The more I read about MaxIm DL5 (or its predecessor MaxDSLR), the more I whish I could use it on my Nikon. It seems to be pretty awesome for focusing, taking images...
Sch...!!!! A complete session for nothing. I set my camera on JPEG - assuming that it would make a RAW copy in the second flash drive. BUT NO! It created a JPEG copy in the second, so I ended up with 2 JPEG’s of each photo but no RAW. Well, tomorrow again.
I tried taking two movies: from the moon and Saturn. The moon movie is still WAY bright (even though I chose the smallest aperture). Saturn is almost not visible at all.
Read more about astrophotography. By surfing for some programs/equipment I found a GPS for the Nexstar that sets location and time automatically - ordered that!
Then I was reading more about taking photos through the telescope and read about focal reducers. Ordered one for the Nexstar - hopefully that will improve my pictures.
Took the camera out to the beach at 10pm. I used the 50mm f1.4 lens. Boy! what a difference it makes not to have all the city lights!!!
But I’m still struggling with all the settings that I have to adjust. First, I forgot to set the lens to manual focus (and was wondering why on some images there were no stars and on others there were). Then I realized that I took the first set of the big dipper with ISO 100.
Also, it was surprising to see how little of the sky the 50mm lens takes. I was afraid that it would span WAY too much. But I can’t even get the entire big dipper or swan on the photo.
And I took some photos with automatic dark correction and some without to try it out. But I should probably take the same set with and without to really compare the effect (vs. taking a separate set of darks and correct afterwards).
- Big Dipper - ISO 100 - With Long Exposure dark correction
- Deneb - ISO 400 - With Long Exposure dark correction
- Altair - ISO 400 - Without Long Exposure dark correction
I also took a movie of the moon to try to stack moon “pictures”. Let’s see how that works.
And then I took some random pictures (not to be stacked or such) - some of them actually look very nice!
Couldn’t sleep and tried out some more things:
First: compare taking pictures with Nikon Camera Control to taking pictures with ImagePlus Camera Control:
The process is much better with ImagePlus - unfortunately, it still stops or crashes way too often.
Then I took pictures from IC 1396 and M 11 (the M11 with ISO 6400 and ISO 400 - to compare details vs. brightness).
Got my demo version of ImagePlus. I like the approach for post-processing: set everything up (as with the other programs, default parameters pretty much work). And then let it run through all the steps to final, combined image. Way less manual intervention. But the resulting image doesn’t seem to be as convincing as the ones from DSS or Nebulosity.
Also, I could easily connect my camera to ImagePlus (connect, live view). Trying to figure out how to control it now. It’d be awesome to have a proper control program that takes care of all the images, breaks... Unfortunately, ImagePlus crashes A LOT! I can connect (most of the time). I can do basic things like “Live View” or even focus. But when I try to take a photo, download it … it throws at least an error message or crashes and I have to re-establish the connection.
I purchased a DSUBS cable - several of the camera control/image acquisition programs seem to need that for connecting to the camera.
I’ll try to stack my images in the various image processing programs. I’ll stack all 5 series, both with and without the dark frames. That’s 10 series per program...
1. DeepSkyStacker:
Super easy!
- Deneb (ISO6400) - nothing of the milky way, lots of stars, unfortunately there are some trails
- Deneb (ISO1600) - significantly less stars (though the overall shutter speed was the same)
2. Nebulosity
- Can’t use the image acquisition stuff because it doesn’t support Nikon :-(
- A little more manual then DSS, but still OK - but only if the result is significantly better then DDS
- By default it does not deal with rotation (which my telescope somehow introduced last night) - makes stacking a little more manual (needs marking 2 stars instead of one)
Tried various image acquisition software, but they all can’t connect to the Nikon: DSLR Shutter, Maxim DL, Nebulosity can’t deal with Nikon (many softwares can only deal with Canon but not with Nikon :-(
Also tried Maxim DL for post processing, but it seems to have a completely different approach (all others have the approach to start with lights, darks... and then go from there). Not sure if I want to try it further.
Installing ALL kinds of software to try out:
Unfortunately, all photos that I took so far don’t result in anything :-(
I couldn’t find a set of photos (lights, darks...) anywhere. So, I have to try to take another set tonight.
Installed the camera mount on the Celestron - in the process, I had to take off the sky finder - which means I’ll have to completely readjust it. Too bad, that the finder does not work at all during day time - I have to wait until it’s dark to do that.
But I found a very good step by step explanation of lights, darks, flats... and also how (especially in which order) to acquire them: http://www.saratogaskies.com/articles/cookbook/. That what I will try tonight.
Another set of instructions is http://astro.welsh-house.net/tutorial.html#c.
Just realized that with the camera now on top, I can tilt the telescope all the way upwards.
- Took my flat pictures (max ISO, ¼ sec) - 12. Didn’t focus infinitity - hopefully that doesn’t won’t screw these up. img0012 - img0025
- Re-calibration of the sky finder didn’t take too much time. But it feels as if the camera mount made this whole thing a little wabbly :-(
- Wow! Didn’t realize how much of an effect it has when I just set my focus to the “infinity end”. Turns out that there is indeed a focus length of “beyond infinity”. Correcting it (through the monitor of the camera - not the live view!) made a HUGE difference!
- Had to wait until 12:20 or so until all our backyard lights are out - need to set this to midnight
- Read over the instructions for flats - turns out I did it all wrong. Well,if I wake up tomorrow morning at dawn (unlikely!) then I’ll shoot some then, otherwise I’ll just do with the lights and the darks.
- 1st set (ISO 6400 - shutter speed 30s): lights: img0039 - img0066, darks: img0067 - img0075
- Second set of lights (ISO 1600): img0076 - img00, darks: img00 - img00
- Shit! The ISO 1600 pictures have quite the trails with 30 seconds. I checked the 6400 again - nothing (or maybe a little). I can’t believe that the lower ISO makes the trails come out more... Anyway, have to shoot the 1600 again with a slower shutter speed - 10 seconds seems to work well. Will take 9 instead of 3 sets now (to compensate for the shutter speed of a third).
- 2nd set (ISO 1600 - shutter speed 10s): lights: img0104 - img0184, darks: img0185 - img0193 (almost forgot to take the darks!)
- 3rd set (ISO 400 - shutter speed 10s): lights img0195 - img0276, darks:img0277 - img0285
- Andromeda!!!
(ISO 1600 - shutter speed 10s): lights: img0295 - img0330, darks: img0286 - img0294
These pictures were almost half covered by the big redwood tree - not sure if and how stacking and dark calibration will work.
- OK, one more: IC 1396
With the big lens (300mm)
ISO 1600 - shutter speed 10s
lights: img0331 - img0412, darks: img0413 - img0421
And that’s it. Almost 3am !!!
Got a new laptop - a Windows machine! Installed Nikon software and now trying out some Windows-based imaging software.
I also got my camera mount for the Celestron. That should make it a little easier to take good/stable photos through the camera lenses.
I think I’m ready to give up on PixInsight. I tried several times just to batchconvert my images from last night to their .fit format. But every time PixInsight just hangs. Also, I doubt that I will use all its crazy functionality any time soon. Maybe better to start with something simpler and after some time try it again (plus it’s 171 Euro!!!)
Tried to understand PixInsight - not much progress.
Mailed the digital_astro mailing list about help. Somebody pointed me to the “DSL Astro Image Processing mailing list” - exactly what I was looking for. Also, seems as if others can do all their image acquisition and picture processing with a laptop. So, I might go for the Samsung Series 7 (have to explain this to Beth).
In the evening, I made some pictures of the big dipper (5s and 10s) - just camera on the new ball head. I should use these for practicing, but I’m really tired (the last 2 nights I got to bed at 2!) On the other side, using the (overpriced) Nikon Camera Remote Control Pro 2 seems to be awesome. I could bracket some pictures to find out ISO and exposure time (unfortunately, it only allows for 3 bracket photos) and then take up to 9 individual pictures automatically. What’s mostly in the way of doing this smoother is my MacBook Pro - with the browser (and all my crazy tabs) open and NCRCP and Nikon ViewNX (it can load the .nef files MUCH faster then the Mac Viewer), it’s constantly swapping. I think it’s really time to get a better laptop for this.
Did a late night session to practice stacking. Unfortunately, I could not setup 3 object SkyAlignment. Instead I had to do a 1 object alignment (using Altair). With that I tried to point to the Andromeda Galaxy - but I doubt that it was actually pointed at it. But I noticed long trails in the first photo. Remembered the rule of 600 and adjusted the exposure time to just 4 seconds (600 / 150 - which is the focal length of the telescope).
I did then Altair itself (and could see that it got out of line fairly quickly, so the alignment was pretty bad). Forgot to take a dark frame image for the Andromeda shots. Will try stacking and such this evening.
<sleep...>
Read about Image Acquisition software and to automate combination of short exposures or even bracketing. Apparently Nikon Camera Control Pro 2 can do this - this might make the $180 worth. But I’ll also check out if “the other software” (also for $180) can do this. Need to try this on Mac (both my trial periods on the Windows laptop expired). This would be supercool to have automated - it’s a pain in the ... to do this manually!
Still trying to figure out what machine I want to get for this:
- A notebook that is powerful enough to do all the image processing and such
- A smaller notebook for just capturing Images - the current (Windows) laptop is even to weak for this
- A faster desktop - could try to use Beth mac or a new more powerful desktop
Downloaded DSLR Shutter - looks simple - maybe too simple. And I can’t connect it to my camera :-(
Will try out Nikon Camera Control Pro 2 tonight. Unfortunately, I installed it already on my laptop and on the Windows laptop - and the trial period expired. Tried on Beth’ computer - doesn’t work for some reasons. I read about it and apparently it does bracketing and series, so I just bought it. I did some basic tests with it - this seems to do everything I need: control, bracketing... and with a surprisingly simple interface!
Checked out Astrosight, Nebulosity and PixInsight.
I couldn’t even figure out how to load photos into Astrosight and Nebulosity. PixInsight seems to be crazy complicated - but at least I could load and convert the images.
Tried to do some sun shots. As always, it’s a pain in the ... to do the initial alignment+focussing with the camera/laptop. Without focus, I can’t do the alignment. But without basic alignment, it’s hard to do focusing as the only thing out there is the sun (i.e. if it’s not in the image, there is nothing to focus on :-( It would be a little bit easier if I could do the focusing through the computer (does the telescope remote control support that?) Or even if I could store that.
The pictures came out VERY blurry. Don’t know if this is because
- I’m doing this in the middle of the city and the warm air movement is just making it so blurry, or
- I can’t focus well, or
- I need some color filter or such
I compared the different sun filters that I have: The photo filter definitively is filtering out less then the one for direct viewing. The sun finder on the new filters is helpful. Ran into the issue that the camera hit the mount when I tried to direct the telescope on the sun when it was VERY high in the sky.
Did some bracketing around exposure times (1/100 - 1/4000). I know now some upper boundaries where I don’t see anything. But because the images are so blurry, I don’t have a clear winner.
I thought more about the focusing issue. Maybe starting with taking photos through the telescope was too ambitious. Ordered a camera mount for the telescope, so that I can piggyback. And also a ball head mount for my tripod for taking photos from there (because the 3 way mount is WAY too complicated).